Exercise 3.2

Start by doing your own research into some of the artists discussed above.
Then, using slow shutter speeds, the multiple exposure function, or another
technique inspired by the examples above, try to record the trace of movement
within the frame. You can be as experimental as you like. Add a selection of shots
together with relevant shooting data and a description of your process (how you
captured the shots) to your learning log.

Some reflections on the work of Sugimoto, Vanvolsem and Woodman

Before I started to make images for this part of the course I looked at the work of a number of artists referred to in the course text. I looked a at number but in this blog entry I focus on the three whose work most influenced the images I made in response to exercise 3.2.


Hiroshi Sugimoto

Firstly I was intrigued by Hiroshi Sugimoto’s long exposure shot taken within a cinema. There is an intriguing dichotomy between the darkness of the cinema theatre, a place that needs to be dark in order to enjoy the projected images on the screen. At 24 frames a second the individual frames create a moving image that although bright in some cases the theatre still remains relatively dark throughout the film. Sugimoto challenges this though and his long collects the light from each on of this frames and in effects starts to add them together. The summative effect of this addition is that the movie theatre looks completely illuminated . The cinema screen appears to be come a source of illumination lighting up the architecture of cinema theatre in a strange light. this light reveals the architecture of the space but of course does not show any of the occupants, the long shutter speed failing to capture evidence of humans.

This whole approach resonated with me. Reading Sugimoto’s Wikipedia page the notion of capturing time is suggested. I must admit to thinking differently to this about the work. If an image captured in a thousandth of second in more traditional approaches to photograph is recording a short moment in time, the Sugimoto, is recording a collection of these, a genuine ‘durational space’ far in excess of the more general use of the medium. The work offer some insight i believe to the idea of time and space. I am intrigued by the use of longer shutter release times and a mechanism to examine time. Some of the images I will post in this section are about exploring time and who we perceive it. In deed the camera it could be argued might be a tool to explore time and travel within it, all be it visually and not literally!!

7pecha_sugimoto

Copyright Hiroshi Sugimoto

If a film is 90 minutes long then the theatre will be illuminated by the glow from 129,600 individual frames and the light they give out!

Maarteen Vanvolsem

Looking on-line at the work of Maarteen Vanvolsem at the online Kussneers gallery I was very interested again in the notions of the camera as a device to record time. Vanvolsem suggested that the technology of the camera reveals something the eye cannot see, indeed he asks the question:

“Do images, built in time by the movement of the film, give us an image of time?”

This work not only utilises slow shutter speeds but also the motion of the camera, suggesting that vin some way these two separate controls reveal something to us about the nature of time itself. Although different to the work of Sugimoto, Vanvolsem is asking I believe a fundamentals questions about the mediums ability to reveal something that the human eye cannot see.

Francesca Woodman

A further artist whose work I explored for this part of the course was Francesca Woodman. Clearly a troubled but very talented photographer I found her work strangely compelling. Her self portraits and the portraits and studies of others contained for me some strong and recurring motifs. the first of these was the sometimes derelict and decaying backdrop to her images. Woodman use of 6×6 monochrome was also a further theme. the most engaging aspect of her work however were the images where a slow shutter speed had been used and the subject, sometimes her self had moved during the exposure. again the use of the camera to see something of time that the human eye is unable to capture was something that I thought I needed to explore in my own work.

Some of her work has a dance like quality and I was reminded of the early pioneers of the mediums use of slow shutter to capture what is ordinarily hidden from the eye. There is also a drama to the work, perhaps created by the movement captured in some of the slow shutter images. Of greatest interest to me though in this work was the deep melancholy that appears as a theme. I am uncertain whether this is intentional or whether subconsciously I see this in the work knowing that Woodman had complex mental health issues and committed suicide at a relatively young age. A talent lost and a photographer who perhaps never reached the pinnacle of the success she could have achieved.

images

Copyright the estate of Francesca Woodman

Of all of the photographers work I looked at it was Woodman’s influence that I found most engaging, and this work set me on a track to make some slow shutter, multiple exposed photographs.

References
http://kusseneerscom.webhosting.be/portfolio_page/maarten-vanvolsem/

http://www.gerrybadger.com/francesca-woodman/

Exercise Images

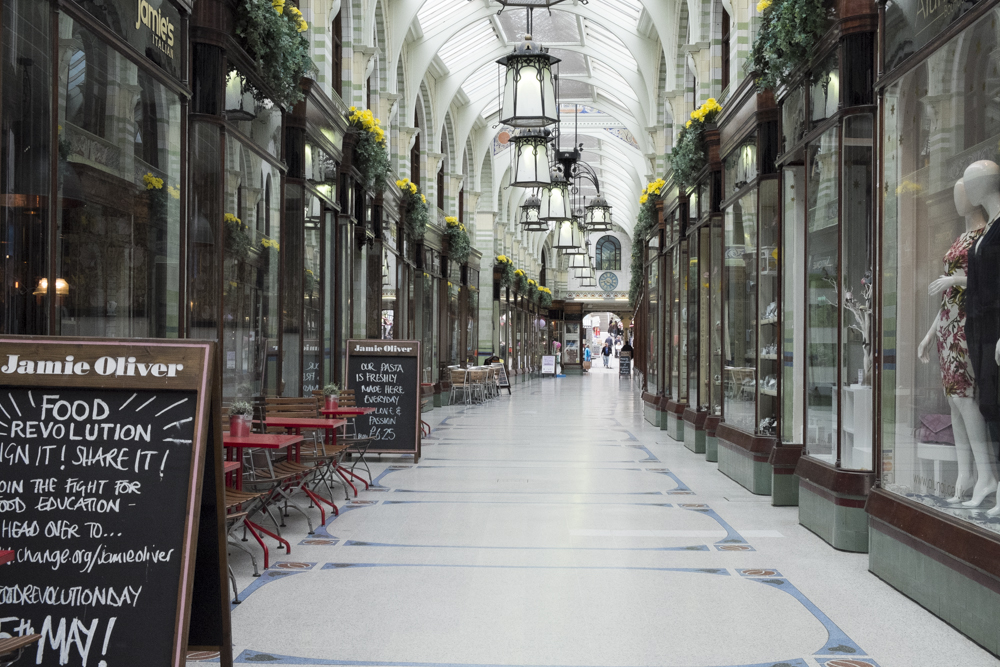
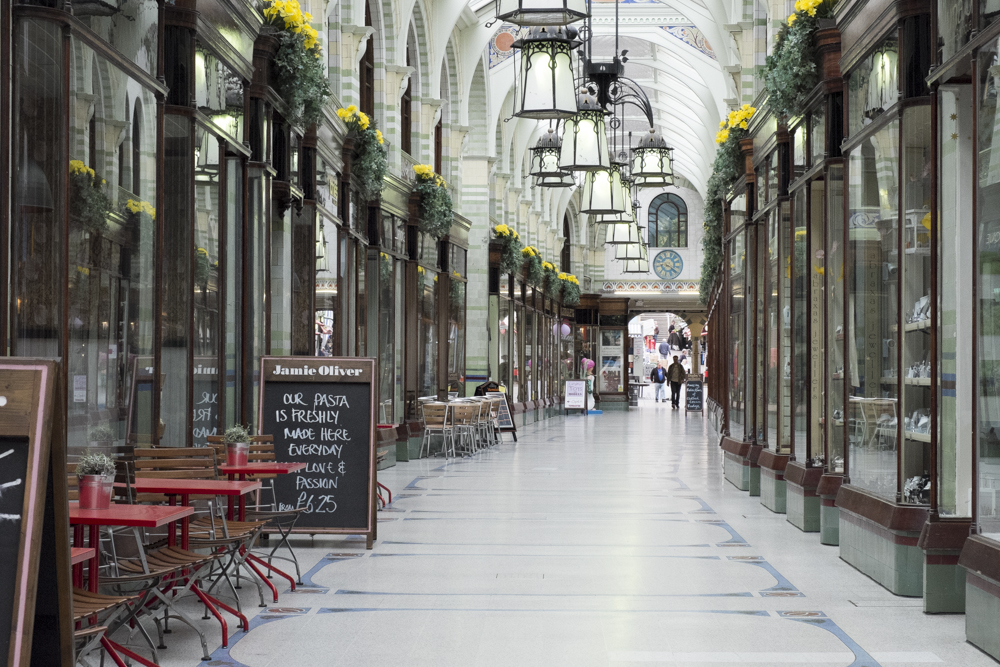
In these firs set of images i wanted to create a contrast between the sharpness of the scene but the blur from people and object in motion. I used a wide angle lens, a small aperture and slow shutter speed. the images were hand held. i am pleased with the juxtaposition of motion in a scene that is on the whole very sharp. the effect creates a sense of dynamism and records a longer moment in time than a usual image. these are all be it short ‘durational spaces’

Motion Bus (1 of 1)
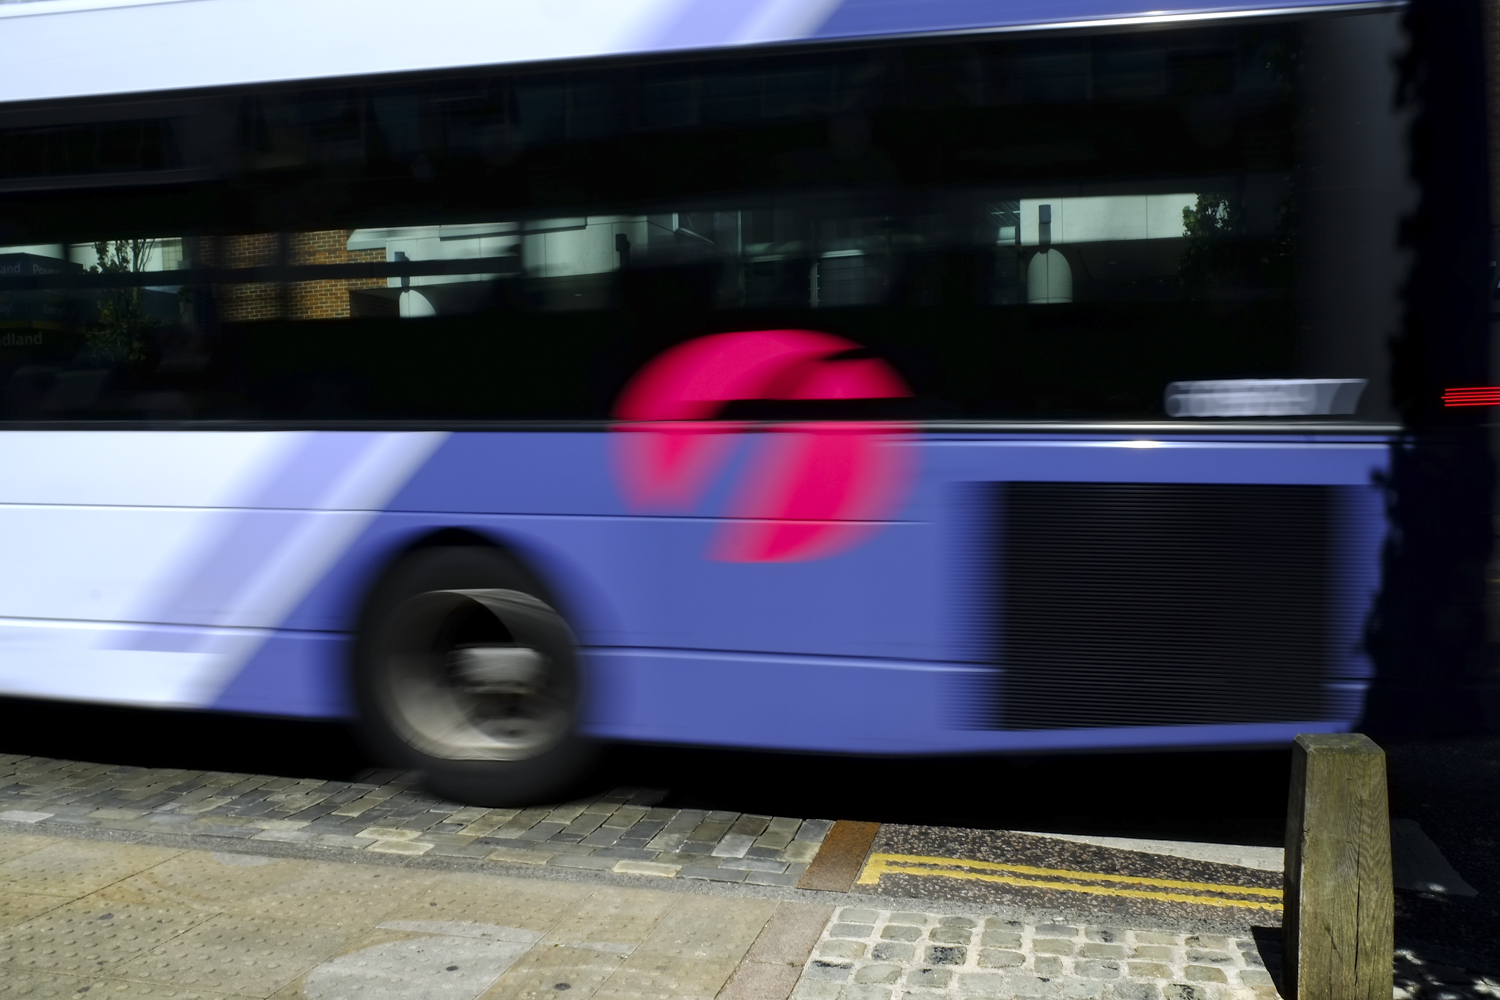
Omnibus in Motion- 18mm F22 at 1/25Camera Motion Blur Motion 6 (1 of 1)Street Crossing- 18mm F22 at 1/20Camera Motion Blur Motion 7 (1 of 1)Street Walkers- 18mm F22 at 1/25


The Durational Space-Movement in time

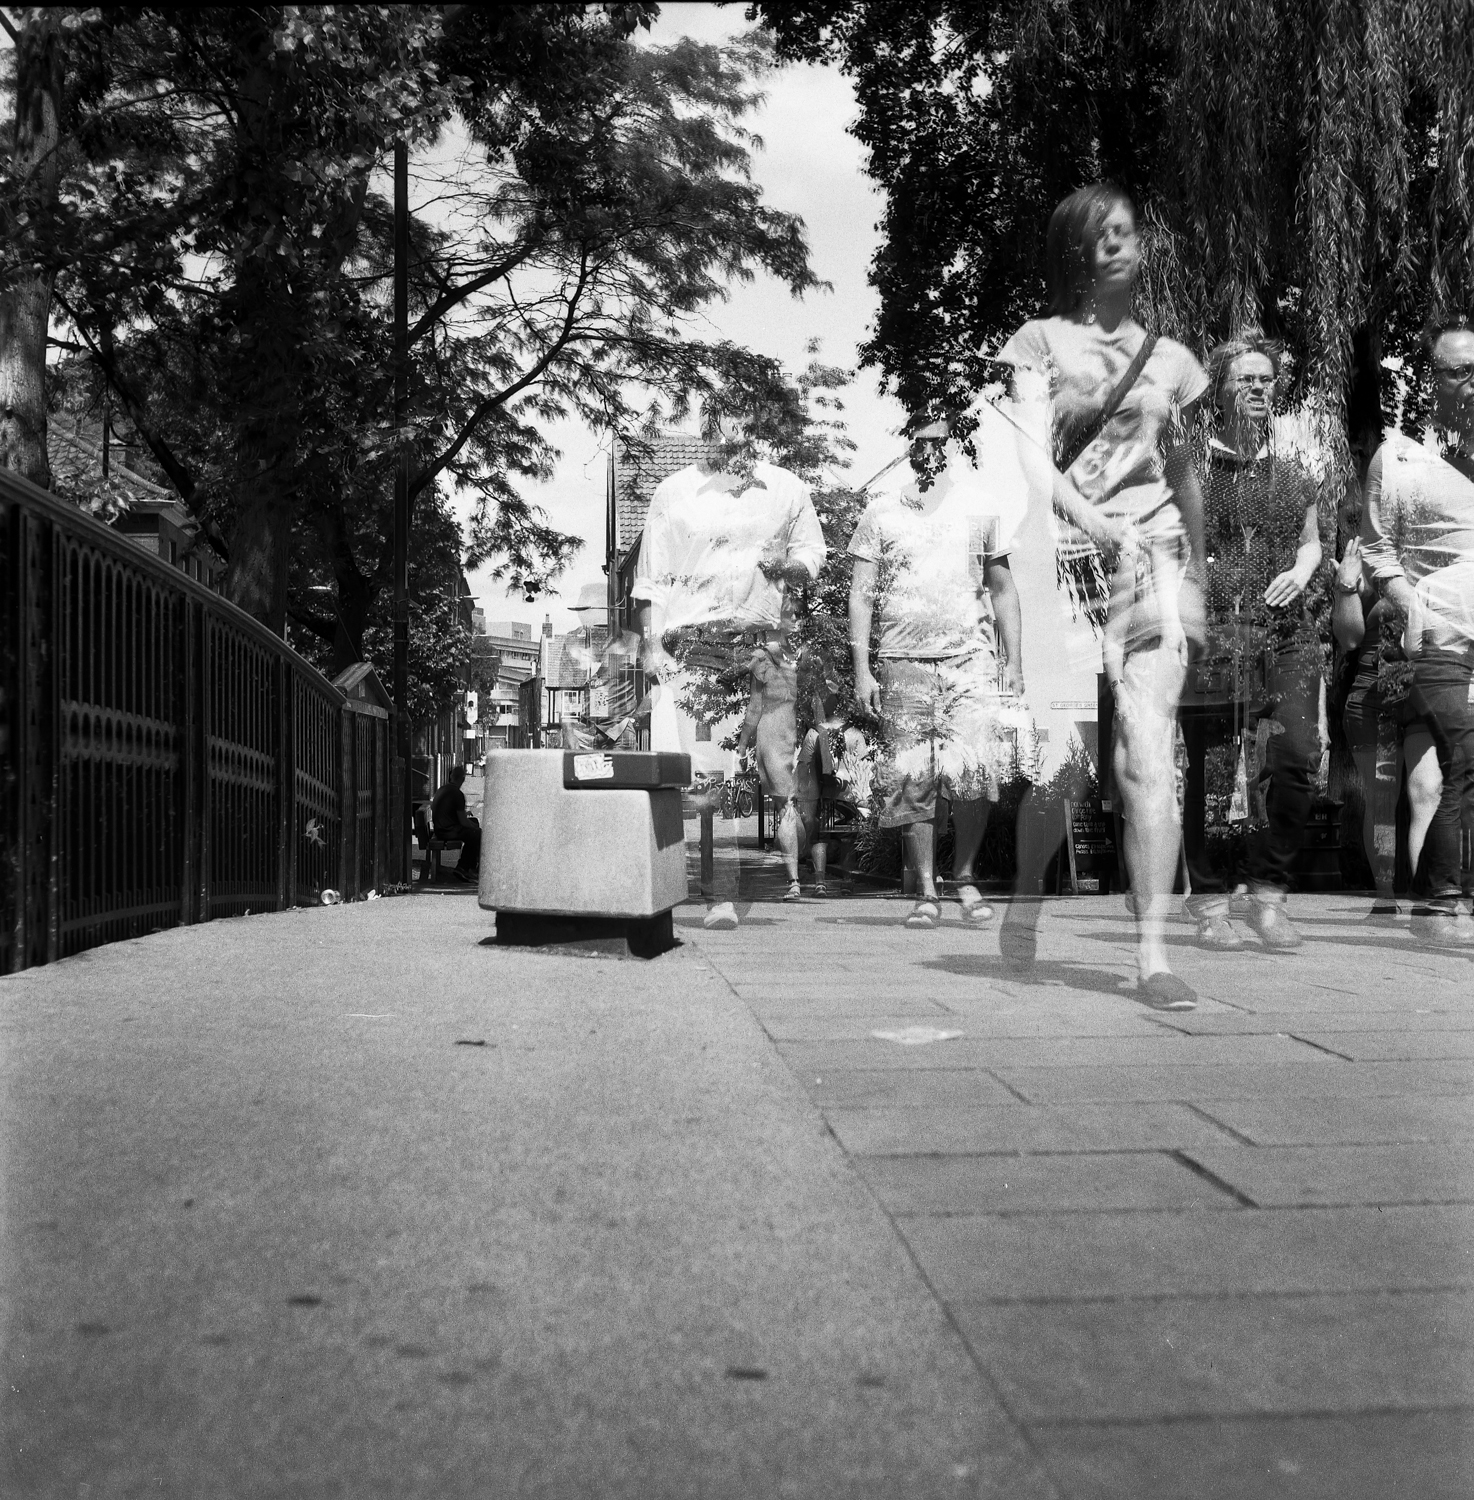
Having experimented taking the images above and reflecting on the work of Vanvolsem I also decide to experiment with slow shutter speeds and camera motion. The idea was not only to capture a long moment in time but also to scan the camera across a sen in the process. In my own way I was trying to record time in the way Vanvolsem describes in much of his work. The final images have a surreal and abstract quality but they also say something about time.


Camera Motion Blur Motion (1 of 1)Bridge 1- 18mm f22 at 1/9 secCamera Motion Blur Motion 2 (1 of 1)Bridge 2- 18mm f22 at 1/8 secCamera Motion Blur Motion 3 (1 of 1)Bridge 3- 18mm f22 at 1/6 sec

The durational space explored further through multiple exposures

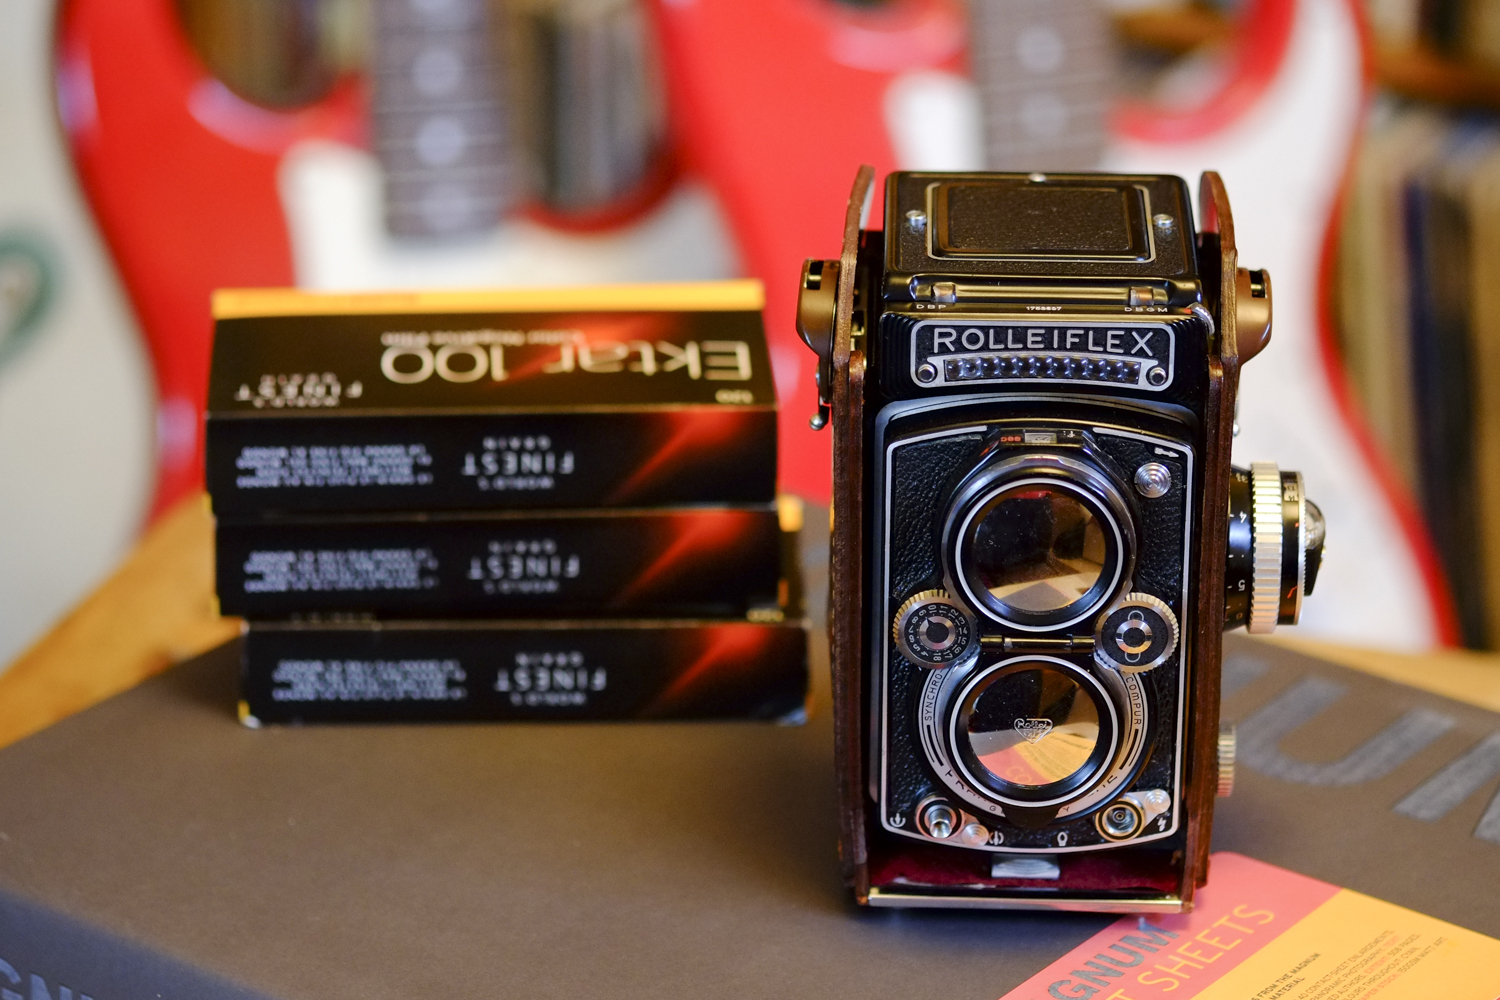
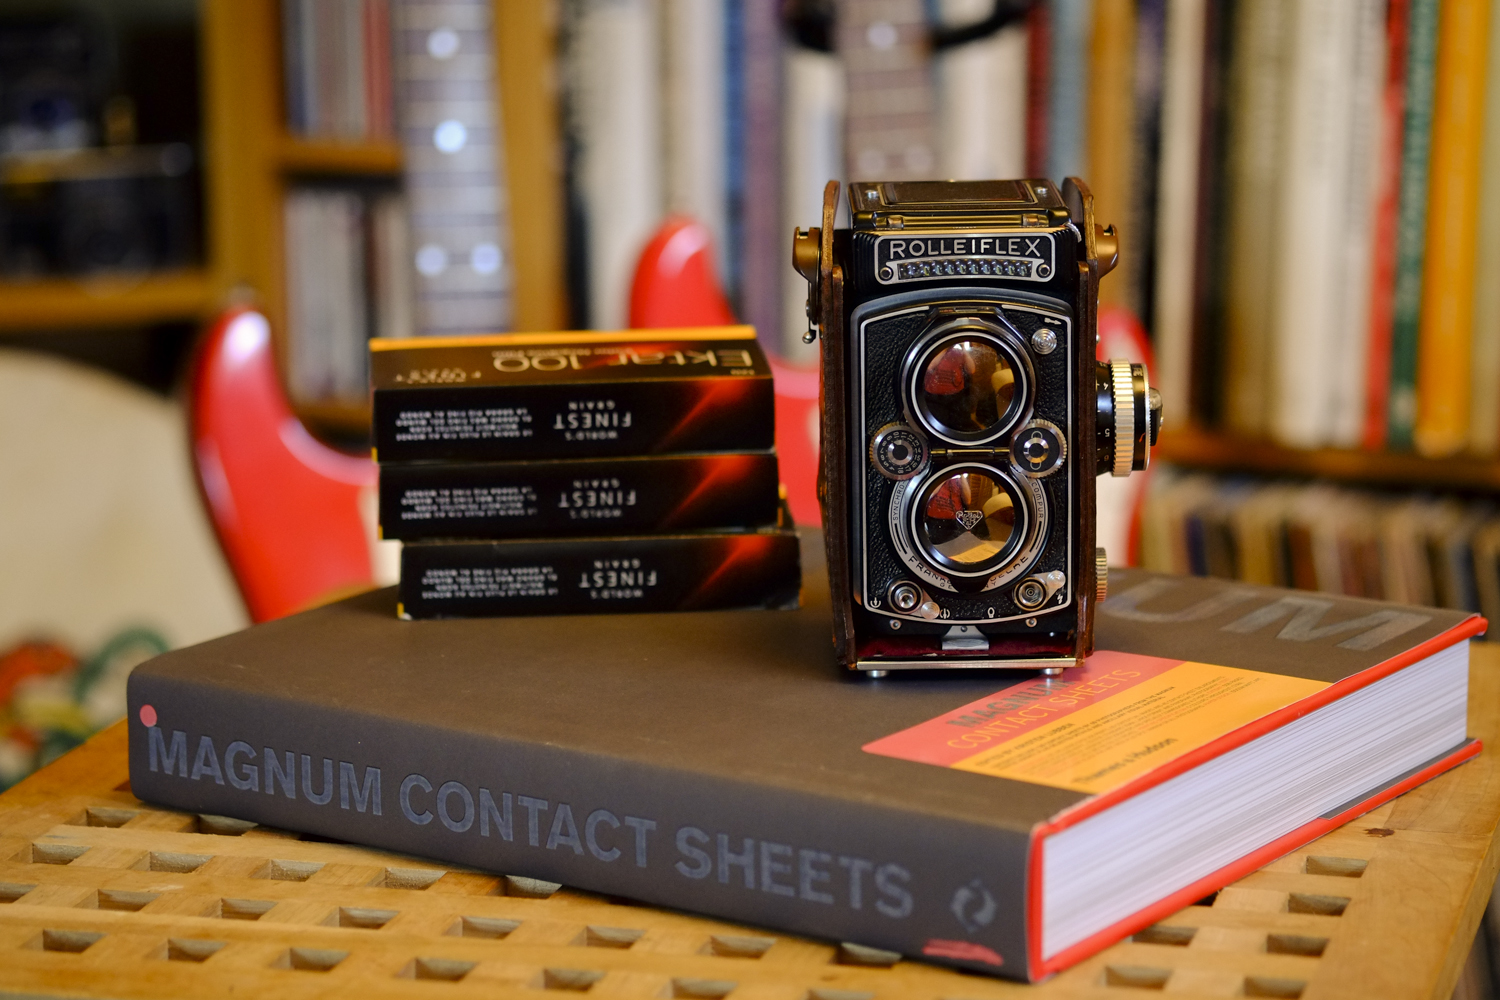
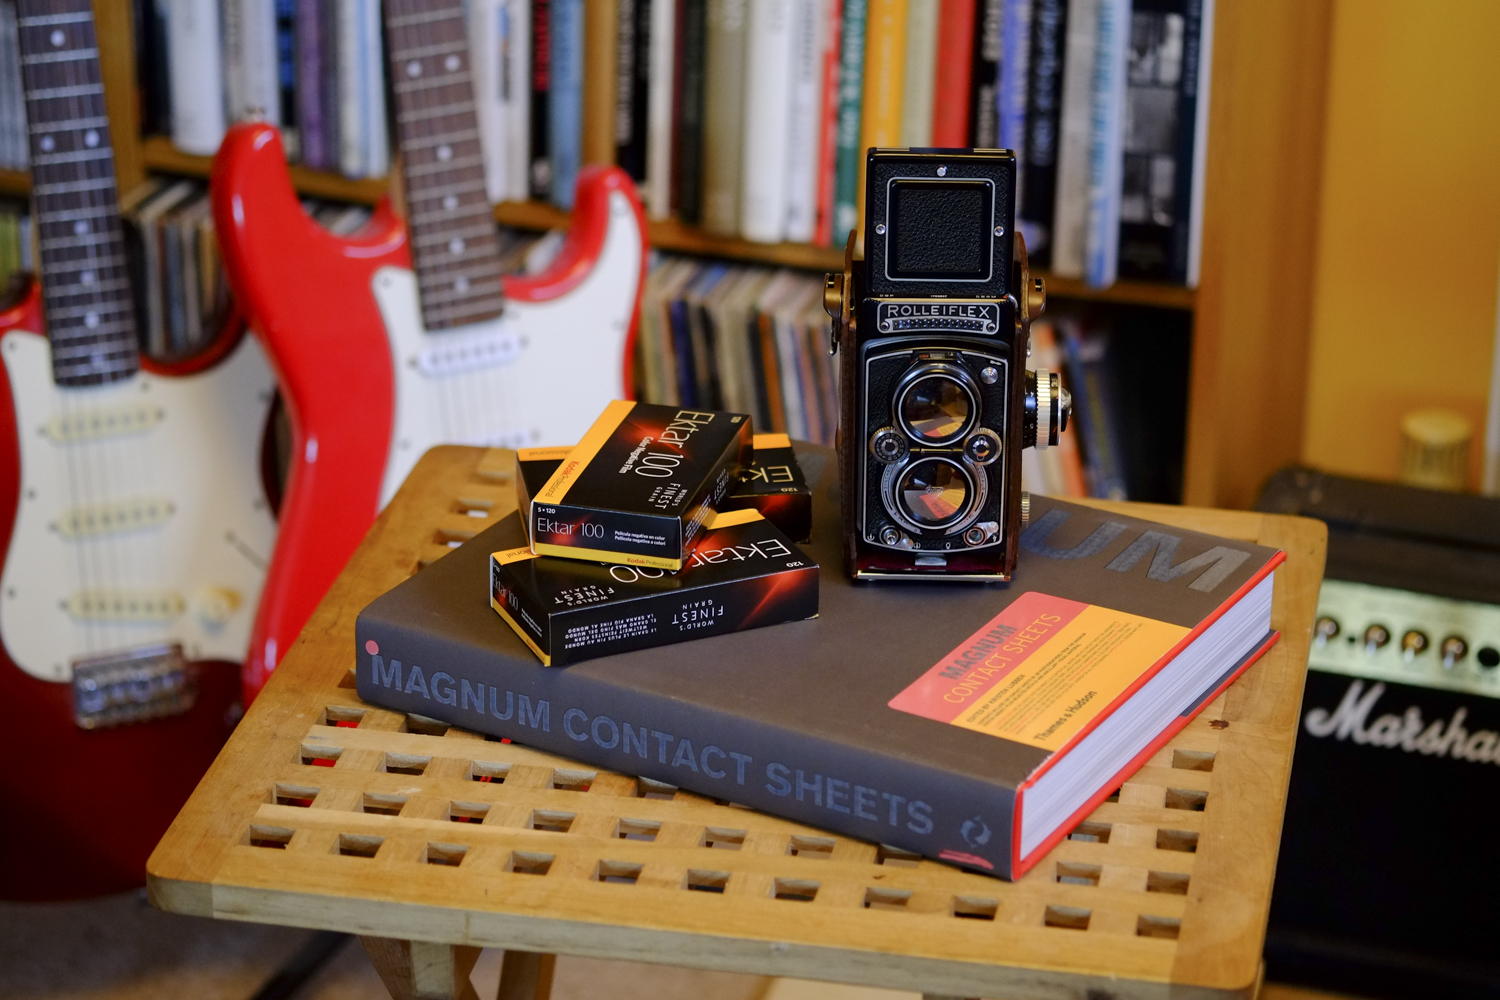
I wanted to explore the notion of the camera controlling and representing time in different ways further and with this in mind felt i needed to use a film camera capable of multiple exposures to bring to a conclusion this set of exercises.

Cord and Mac (1 of 1)

To do this I used a 1959 Rolleicord Va II roll film camera and 120 monochrome film. The camera has an excellent multiple exposure feature a very quiet shutter and would allow me create a range of effects in the camera. I used Shanghai GP3 120 100 ISO film and processed it in Ilford Ilfotec LC29 at 1-29 dilution. I metered (incident reading) for each scene and then reduced the exposures by two stops to try an reduce the risk of the film getting too over exposed during the multiple exposures. I shot three images on each negative and used an aperture of f8 and a shutter speed of 1/8 second. The resulting negatives were scanned and sharpened slightly as I do with all scanned negs.

I wasn’t completely satisfied with the quality of the final images but this is an approach that I am going to explore further. Again I think i have created a range of durational spaces through the use of slow shutter and  multiple exposures. 

GP3 2 (1 of 1)GP3 5 (1 of 1)GP3 7 (1 of 1)GP3 4 (1 of 1)GP3 6 (1 of 1)GP3 t (1 of 1)


All of the above images were produced in camera and with minimal processing. as stated above this is an approach that I will explore further in my own work and the work for the course.

Exercise 3.1

Using fast shutter speeds, try to isolate a frozen moment of time in a moving subject.
Depending on the available light you may have to select a high ISO to avoid visible
blur in the photograph. Try to find the beauty in a fragment of time that fascinated
John Szarkowski. Add a selection of shots, together with relevant shooting data and
a description of your process (how you captured the images), to your learning log.

This section of the course is challenging me to think about shutter speeds and freezing moments in time. I have for some time thought of image making as capturing thin slices of time, a moment frozen forever, captured and never to be repeated.

With this in mind I undertook some simple experiments with a bowl of apples, my camera and gravity! after a shooting a number of frames I settled on the one below:

Apple Master (1 of 1)

35mm (1.5x Crop Sensor) 1/250 at f2 ISO 6400

The fast shutter speeds has a allowed a moment in time to be frozen. the apples hang in the air defying gravity. a moment to fast for the human eye to se is recorded forever! There are some excellent examples of fast shutter being used to capture moments beyond a humans ability it see in the excellent Revelations Exhibition at the Science Museum. My blog entry review of the exhibition can be found in the research section of this blog

Below are some examples of shots from my experiments with the bowl of apple and gravity:

Apple Test 15 (1 of 1)

35mm (1.5x Crop Sensor) 1/250 at f2 ISO 6400

Apple Test 17 (1 of 1)

35mm (1.5x Crop Sensor) 1/250 at f2 ISO 6400

Apple Test 18 (1 of 1)

35mm (1.5x Crop Sensor) 1/250 at f2 ISO 6400

Apple Test 7 (1 of 1)

35mm (1.5x Crop Sensor) 1/250 at f2 ISO 6400

Apple Test 9 (1 of 1)

35mm (1.5x Crop Sensor) 1/250 at f2 ISO 6400

Exercise 2.7

Use a combination of small apertures and wide lens to take a number of photographs exploring deep depth of field. Because of the small apertures you’ll be working with slow shutter speeds and may need to use a tripod or rest the camera on a stable surface to prevent ‘camera shake’ at low ISOs. Add one or two unedited sequences, together with relevant shooting data and an indication of your selects, to your learning log. Achieving deep depth of field might appear easy compared to the difficulties of managing shallow depth of field. We’re surrounded by images made with devices rather than cameras whose short focal lengths and small sensors make it hard to achieve anything other than deep depth of field. The trick is to include close foreground elements in focus for an effective deep depth of field image. Foreground detail also helps to balance the frame, which can easily appear empty in wide shots, especially in the lower half. When successful, a close viewpoint together with the dynamic perspective of a wide-angle lens gives the viewer the feeling that they’re almost inside the scene.
Liverpool Street Station at f16
It would have been very easy to choose a rural vistas for this exercise as I live in the east Anglian Country side. I purposely choose to do something different I am exploring the idea of documenting parts of my life and this presents opportunities, indeed challenges to me to think and shot differently as part of this course.

In looking at this exercise I chose an 18mm (27mm equivalent on a 35mm format camera) wide angle lens and set its aperture to f16, its slowest f ratio. Even with the cameras ISO set to 2200, this still yielded shutter speeds of between 1/4 and 1/12 of a second. Using the hand rail on the upper balcony rail of the arrival and departure hall at Liverpool Street station as a makeshift support for the cameras I was able to record the scene. tripods are forbidden in this space so I was improvising! whilst there is some movement as subjects moved during the exposure , the station building and furniture are sharply frozen in time form the front to the back of the sen

The scene had the appropriate level of depth as required in the exercise and I thought it would be a test for the lenses resolving power at it narrowest aperture.. The images show the effect of a wide lens and narrow aperture, there is a wealth of detail and depth in the foreground, mid ground and in the distance. My choice of subject did throw in some interesting effects though. With the relatively long exposures some of the people in the images have been frozen because they remained still, but those that were walking are blurred. The overall effect  creates a kinetic sense of movement and action of people in motion within the the scene, whilst still freezing the station. These are deep depth of field images, showing the effect of the smallest prepare on the lens. I was reminded of the photographers of the Group f64*  seeking to capture the maximum level of detail in images, trying to capture a new perspective on reality, using photography to make a statement about a new art.

At f16 I was not quite eligible for the group!

Liverpool Street 1 (1 of 1)

18mm f16 at 1/4 sec

A selection of the unprocessed images

Liverpool Street 1 (1 of 1) 

 18mm f16 at 1/10 sec

Liverpool Street 3 18mm f16 1-12 (1 of 1)

18mm f16 at 1/12 sec

Liverpool Street 3 18mm f16 1-12 (1 of 1)

  18mm f16 at 1/10 sec

Liverpool Street 5 18mm f16 1-40 (1 of 1)

18mm f16 at 1/40 sec *

Group f64 where a group of American landscape photographers in the early 20th century whose style and approach was to produce very sharp well framed realist ( some times called a modernist style) landscape views of the United States. There was an epic sense of the American wilderness in their work that said something about the place beyond the mountains  and forests pictured in their images. some members of the group were also known for the outspoken views about what they saw as less authentic pictorialist images. The tensions between Adams and Key exponents of the group were Edward Weston, Ansel Adams and Imogen Cunningham.

Exercise 2.6

Use a combination of wide apertures, long focal lengths and close viewpoints to take a number of photographs with shallow depth of field. (Remember that smaller f numbers mean wider apertures.) Try to compose the out-of-focus parts of the picture together with the main subject. Add one or two unedited sequences, together with relevant shooting data and an indication of your selects, to your learning log.

Wide apertures create shallow depth of field, especially when combined with a long focal length and a close viewpoint. In human vision the eye registers out-of-focus areas as vague or indistinct – we can’t look directly at the blur. But in a photograph, areas of soft focus can form a large part of the image surface so they need to be handled with just as much care as the main subject.

Don’t forget that the camera’s viewfinder image is obtained at maximum aperture for maximum brightness and therefore at the shallowest depth of field. Use the depth of field preview button to see the actual depth of field at any particular aperture. (This is especially useful in film cameras where you don’t have the benefit of reviewing a shot immediately after you’ve taken it). It’s surprising to see the effect that a single f stop can have on the appearance of an image.

Still Life at f2.4

For this exercise I decided to take the images inside. In part that on the day i had some time to execute the work the English weather decided not to cooperate. I tend to shoot fairly rarely indoor so there were some added challenges to this work. 

To demonstrate and experiment with the shallow depth of field I created a simple still life scene and selected a 60mm focal length lens (90mm equivalent on a 135 full frame) I chose a reasonably fast lens with a maximum aperture of f2.4. I shot all the images with the lens wide open in order to force myself to manage the shallow depth of field that this setting would create. I was very mindful of the out of focus areas when composing the shot and I was trying to bring a commercial feel to the images. 

Interestingly in the excerice I had to take far more shots in order to get some images that I was pleased with. This was quite different to the exercise with a wide angle lens at small aperture. Logically this is because with a longer focal length at wide aperture there is a much greater chance of getting images that are out of focus or where focus is not concentrated on the part of the scene the photographer intended. A further observation is that a tripod would not really assist with this because in the focal length aperture combination the issues relating to focus are far more about where the photographer frames the ‘in focus ‘ and ‘out of focus’ elements of the image than they are about things like camera shake. I came to the view that this was very much a framing exercise. It also tested me to think about where  I wanted the emphasis in the image to be.

Rolleiflex and Ektar 100

Rolleiflex final 3 60mm f 2.4 (1 of 1)

1957 Rolleiflex 3.5E and 15 rolls of Kodak Ektar 100 at f2.5

Rolleiflex 6 60mm f 2.4 (1 of 1)

60mm f2.4  1/120sec

Rolleiflex 3  60mm f 2.4 (1 of 1)

60mm f2.4 1/110sec

Rolleiflex 1  80mm f 2.4 (1 of 1)

60mm f2.4 1/60sec

Rolleiflex 2  60mm f 2.4 (1 of 1)

60mm f2.4 1/110sec

Rolleiflex 7 60mm f 2.4 (1 of 1)

60mm f2.4 1/120sec

Rolleiflex 5 60mm f 2.4 (1 of 1)

60mm f2.4 1/60sec

Reflections and Learning

Reflecting on the exercise I was being influenced by commercial and adversing photography. this is a disciple I suspect where focus and where the eye is drawn is a vital marketing tool. I was reminded of one of the quotes in the course materials:

“The most political decision you make is where you direct people’s  eyes”      Wim Wenders*                                                                    

Controlling where people look in an image is a vital tool in image making. With  a wide angle lens and small aperture the observer is almost invited to explore the whole scene, it is all sharp and it is all available. 

With the wide aperture long focal length lens the photographer can control where the observer look long after the image was taken, indeed long after the photographer is gone!

References

Wenders , W. (1997)  Quoted in Expressing Your Vision Course Materials OCA 2015

Exercise 2.5

Find a subject in front of a background with depth. Take a close viewpoint and zoom in; you’ll need to be aware of the minimum focusing distance of your lens. Focus on the subject and take a single shot. Then, without changing the focal length, set the focus to infinity and take a second shot. The closer you are to the subject, the shallower the depth of field; the further from the subject, the deeper the depth of field. That’s why macro shots taken from very close viewpoints have extremely shallow depth of field, and if you set the focus at infinity everything beyond a certain distance will be in focus. As you review the two shots, how does the point of focus structure the composition? With a shallow depth of field the point of focus naturally draws the eye, which goes first of all to the part of the image that’s sharp. It generally feels more comfortable if the point of focus is in the foreground, although there’s nothing wrong with placing the point of focus in the background.

This was an interesting exercise considering some aspects of ‘lens work’ that I have often taken for granted. I have a solid understanding about how  lens controls (focus and aperture combination) influence depth of field and where emphasis is placed in a scene as a result of such controls. As this section of the course is about imaginative space I pondered on the lens as a tool for controlling and managing the space seen by a viewer in a final image. 

BM Railing 1 18mm f2.8 1-2700 (1 of 1)

In the first image I focused on the gate railings of the British Museum. The 18mm lens was focused on the detail of the railing bars and an aperture of f4 was used. The background was thrown out of focus. In my view the out of focus background creates a sense of emphasis forcing the viewer to look at the detail in the railings. This shallow depth of field technique is often used by photographers to manage space, forcing the viewer to look at a specific part of a scene. In effect space in the image is managed by the intent of the photographer. Portraiture is just one example of practice that uses this shallow depth of field and out of focus background to manage what the view sees. BM Railing 218mm f4 1-2700 (1 of 1) In this second image the focus was set to infinity. Now the railing bars are out of focus and the background is in focus. in this shot the areas of sharper focus and the railing bars in from ‘jar’ on the eye in my view and whilst there is nothing wrong with this there is some visual conditioning that makes this juxtaposition seem wrong. The image just does not look right. The effect I described in the previous image does not work in reverse. An out of focus foreground and sharp background only serve to create a sense that something that is not necessarily wrong, but that does feel unsatisfying ( what ever satisfying actually is??). That said I have seen photojournalists use this effect to create a sense of alienation, perhaps relying on the uncomfortable effect foreground blur creates. Something to think about in future work?

Another image to emphasise the impact that an out to focus background has on emphasising the foreground, again using a wide aperture and focusing on the object in the foreground.

Fisrt class1 18mm f2.8 1-105 (1 of 1)

Exercise 2.4

Find a location with good light for a portrait shot. Place your subject some distance in front of a simple background and select a wide aperture together with a moderately long focal length such as 100mm on a 35mm full-frame camera (about 65mm on a cropped-frame camera). Take a viewpoint about one and a half metres from your subject, allowing you to compose a headshot comfortably within the frame. Focus on the eyes and take the shot. Longer focal lengths appear to compress space, giving a shallower depth of acceptable sharpness, which is known as depth of field. This makes a short or medium telephoto lens perfect for portraiture: the slight compression of the features appears attractive while the shallow depth of field adds intensity to the eyes and ‘lifts’ the subject from the background.

Portrait

In the exercise I resisted the temptation to take the shot in portrait mode. I am trying to keep all of my images at the moment in landscape format. I chose a simple background but one in which there would be some out of focus detail that would create a space to frame the portrait and as suggested in the course materials I focused very specifically on the eyes. The image was taken with a 60mm (90mm 135 equivalent) and it was set  at its widest aperture f2.4).

Katy portrait 11 60 f2.4 (1 of 1)

As a film shooter ordinarily (this is a digital image) I tend not to take lots of pictures and try and get the shot I want on the first or second attempt. This image was one of three shots and in this one the focus on the eyes was the strongest. The image has had a hint of sharpness adjustment and other that that is straight out of the camera. With hindsight I should have reduced the aperture by one stop and that would have aided the focus upon the eyes without limiting the shallow depth of field too much.  the finished impact of the shallow depth of filed in this image does I feel lift the subject from the background and direct the viewer to focus on the subject.

Exercise 2.3

Choose a subject in front of a background with depth. Select your shortest focal length and take a close low viewpoint, below your subject. Find a natural point of focus and take the shot.

You’ll see that a very wide lens together with a close viewpoint creates extreme perspective distortion. Gently receding lines become extreme diagonals and rounded forms bulge towards the camera. Space appears to expand. The low viewpoint adds a sense of monumentality, making the subject seem larger than it is, and tilting the camera adds to the effect as vertical lines dramatically converge. Not the ideal combination for a portrait shot!

Monument!

For this exercise I took several images to try and demonstrate the point being made in this exercise. I chose a wide angle lens, an 18mm (27mm in 135 format) and used a low shooting angle to create the sense of monumentality referred to in the course materials.

The humble Victorian post box that was the subject of the shot is given the appearance of being quite grand even though in reality is is actually really quite small!

The point made in the course materials about this not being an approach for portraiture is well founded. I did take two images of my daughter using this technique which she utterly forbad me from using or sharing!!!

postbox moon118mm f2 (1 of 1)

postbox 118mm f2 (1 of 1)

Exercise 2.2

Select your longest focal length and compose a portrait shot fairly tightly within the frame in front of a background with depth. Take one photograph. Then walk towards your subject while zooming out to your shortest focal length. Take care to frame the subject in precisely the same way in the viewfinder and take a second shot. Compare the two images and make notes in your learning log.

As you page between the two shots it can be shocking to see completely new elements crash into the background of the second shot while the subject appears to remain the same. This exercise clearly shows how focal length combined with viewpoint affects perspective distortion. Perspective distortion is actually a normal effect of viewing an object, for example where parallel train tracks appear to meet at the horizon. A ‘standard lens’ – traditionally a 50mm fixed focal length lens for a full-frame camera (about 33mm in a cropped-frame camera) – approximates the perspective distortion of human vision (not the angle of view, which is much wider). A standard lens is therefore the lens of choice for ‘straight’ photography, which aims to make an accurate record of the visual world.

Portraits at Wide and Narrow Angles

This proved to be a much more complex exercise than I thought it would be and in truth I am very dissatisfied with the final images. I tend not to use zoom lenses and it has been a learning curve for me coming to grips with them. I actually had to buy a pair of zoom lens for this course as my usual preference is prime focus lenses. It was a bit of challenge to get the image scale of the subject in the the narrow and wide angle views to be at the same scale and in my final images I haven’t managed this!

I have however produced a pair of images that illustrate the point about how a wide angle lens close up to the subject produces a very different  background. In my view an unnatural and exaggerated background which given how the human eye naturally sees a scene there is something quite alien about the effect. It does also demonstrate how the photographer can control what the viewer sees and these unnatural viewpoints or perspectives allow for creativity in my view.

In the first Image the focal length of the lens is 55mm (83mm in 135 format) end of the zoom range at f8. in the second image the lens is at 18mm (27mm in 135 format) and again set at f8. It is worth noting that the subject did not like that image at all!

Katy portrait 3 55mm f8 (1 of 1)

Katy portrait 5 55mm f8 (1 of 1)

There is a really interesting learning point for me here about how photography can present an unnatural way to view the world that for some subject (i.e. wide ange landscapes) can be pleasing but for others (i.e. wide angle close up portraits) can be very ‘jarring’ to the eye.

Exercise 2.1

Find a scene that has depth. From a fixed position, take a sequence of five or six shots at different focal lengths without changing your viewpoint. (You might like to use the specific focal lengths indicated on the lens barrel.) As you page through the shots on the preview screen it almost feels as though you’re moving through the scene. So the ability to change focal lengths has an obvious use: rather than physically moving towards or away from your subject, the lens can do it for you. The other immediate difference between the shots is the ‘angle of view’, which also depends on the sensor size of your camera. Use the sequence to try to get a feeling for how the angle of view corresponds to the different focal lengths for your particular camera and lens combination. Which shot in the sequence feels closest to the angle of view of your normal vision?
Does zooming in from a fixed viewpoint change the appearance of things? If you enlarge and compare individual elements within the first and last shots, you can see that their ‘perspective geometry’ is exactly the same. To change the way things actually look, a change in focal length needs to be combined with a change in viewpoint.
A simple scene with depth to illustrate the point about the effects of zooming from a fixed position. Using a camera with a 1.5 crop factor I took a set of 6 images using broadly the same aperture and the images are straight out of he camera in RAW (converted to JPEGs).
The Arcade
 
Arcade 1 18mm f10 1-300 (1 of 1)
 18mm  f10 (27mm equivalent on 135 format)
 
Arcade 2 23mm f10 1-300 (1 of 1)
 23mm  f10 (34.5mm equivalent on 135 format) 
 
Arcade 3 29mm f10 1-250 (1 of 1)
29mm  f10 (43.5mm equivalent on 135 format)
Arcade 4 34mm f10 1-250 (1 of 1)
 34mm  f10 (51mm equivalent on 135 format)
Arcade 5 4mm f10 1-300 (1 of 1)
 44mm  f10 (66mm equivalent on 135 format)  
 
Arcade 6 55mm f10 1-240 (1 of 1)
 55mm  f10 (82.5mm equivalent on 135 format)  


Part One Self Assessment

Based upon the Assessment Criteria set out on page 34

Demonstration of technical and visual skills

I do believe that I have demonstrated some technical skill in this first part of the course. I believe I can control the camera and lens combination and have a good understanding of the implications of differing shutter speed and aperture combinations. Setting the camera in Programme mode was a new experience for me though! I can see the value of this in these early exercises because it did focus the mind on framing, subject selection and the image rather than the process. I feel my work does demonstrate an understanding of the conventions of composition, rule of thirds and what might broadly be called the orthodoxy of composition in practice. However I do recognise that this is both strength and a weakness. I am aware of how this can limit creativity and this is perhaps one of the greatest aspects of learning in this first phase of the course.

Quality of the outcome

I think I have created a simple but coherent structure to the assignments and the exercises set out in my blog. This has been a learning curve as ‘blogging’ is an entirely new experience. It hasn’t been without its challenges and I slowly getting to grips with this activity. I still can’t quite get the blog to co-operate in the presentation of images and the spacing of images and objects in my blog is not quite where I want it to be. In addition to the exercises I have been keeping some research notes and reflections in the Research and Reflection section. As I become more confident in the use of the blog I will increase the pace of posting.

Demonstration of creativity

This is perhaps the weakest area of my work to date. I recognise I need to consider risk taking and break some rules! I also need to free my self from self imposed limits that are probably somewhat entrenched from years of somewhat repetitive image making. I have some clear ideas about this and I hope to take a very different approach in assignment 2 than I did in assignment one. I have very proactively being looking at the work of others but with a view to trying to identify themes and approaches in a

Context

I have really enjoyed researching, with purpose, the work of other photographers. I have for many years enjoyed looking at the work of others but in many respects this has been a passive act, merely observing. I am already far being more analytical I believe. I have also, through the magic of youtube, actively sought out footage of photographers talking themselves. I have done this to hear straight from the horse’s mouth their perspective on the motives for the images they have made. A developing feature of my blog is youtube clips of photographer reflecting on their work. This is something I plan on developing further. I am conscious that my blog entries don’t scratch the surface of all the research into the other artists. Time is perhaps an issue. A good example is that I have spent a lot of time looking at the work of Paul Graham. I find his approach exceptionally engaging, but as yet I haven’t put anything on the blog about this work. I don’t want the blog to be cluttered but equally it does need to reflect the development of my thinking and practice. It isn’t that yet.

Summary

I feel I have made a positive start to the course but I need now to do the following:

1. Synthesise my research into coherent summative learning points that inform what I do when making images, particularly with regard to framing, subject selection and viewpoint.

2. Demonstrate the impact of research and part one exercises in my next assignment

3. Break out from the constraints of my practice to date and produce in Assignment 2 a more creative set of images even if that means producing work that I am uncomfortable with!